
The trailer is parked beside the school lawn, the children are already forming a line, and the event coordinator wants the bounce house running before the next group arrives. One technician is unrolling vinyl, another is looking for the power connection, and a gust is pushing across the field. That's the moment when a rushed corner stake, a skipped site check, or an undocumented weather decision can turn a routine delivery into an incident report.
Bounce house setup is an operational safety process, not a casual party chore. The crew must evaluate the site, select anchoring methods that match the surface, inflate and secure the unit in the correct order, monitor weather, supervise users, and document both setup and teardown. ASTM F2374, the standard practice for commercial inflatable amusement devices, covers design, manufacture, installation, operation, maintenance, inspection, training, auditing, and major modification. Its scope makes the point clearly: commercial inflatable safety includes what happens before the first child enters. ASTM F2374 is a foundational reference for that process.
Why Bounce House Setup Is a Regulated Safety Process
A commercial inflatable is a ride in practical terms, even if it arrives at a birthday party instead of a permanent amusement park. The operator has to control the conditions that affect stability, access, use, and emergency response. That includes the pad, anchor system, blower, entry ramp, exit route, weather decision, and attendant.
ASTM F2374 was originally approved in 2004 and has since been revised to address the full operating life of commercial inflatables, including installation and training. Later revisions placed stronger emphasis on anchoring systems and safer entrance and exit areas. The standard's development reflects a basic operational truth: the inflatable can be manufactured correctly and still become unsafe through poor installation.
The U.S. Consumer Product Safety Commission estimated more than 18,000 emergency-department-treated bounce-house injuries in 2018 and reported 113,272 inflatable-amusement injuries from 2003 through 2013, with more than 90% associated with moon bounces and 12 deaths during that period. Those figures come from the CPSC safety release on bounce houses. They explain why a setup shortcut isn't merely untidy. It can remove the controls that prevent movement, falls, collisions, and weather-related failures.
The setup record matters
A professional crew should treat the installation as a sequence that another trained person could review:
- Site check: Confirm surface, slope, clearance, access, and hazards before unloading.
- Anchor plan: Match stakes or ballast to the surface and use every designated anchor point.
- Inflation sequence: Position the unit, attach the blower correctly, and bring the structure fully upright.
- Final securing: Square the unit, remove slack, and attach tethers according to the manufacturer's instructions.
- Operating controls: Establish wind limits, supervision rules, entry procedures, and inspection intervals.
- Teardown record: Photograph the equipment, note damage, and retain the event documentation.
A venue manager, school administrator, or municipal coordinator should ask for more than a delivery window. Ask who performs the setup, how the unit will be anchored on that specific surface, what weather rule controls shutdown, and what documentation the operator leaves behind. Phantom's inflatable rental options can be evaluated using those same questions.
Practical rule: If the crew can't explain the setup decision, record it, and defend it after the event, the process isn't complete.
Walking the Site Before You Unload
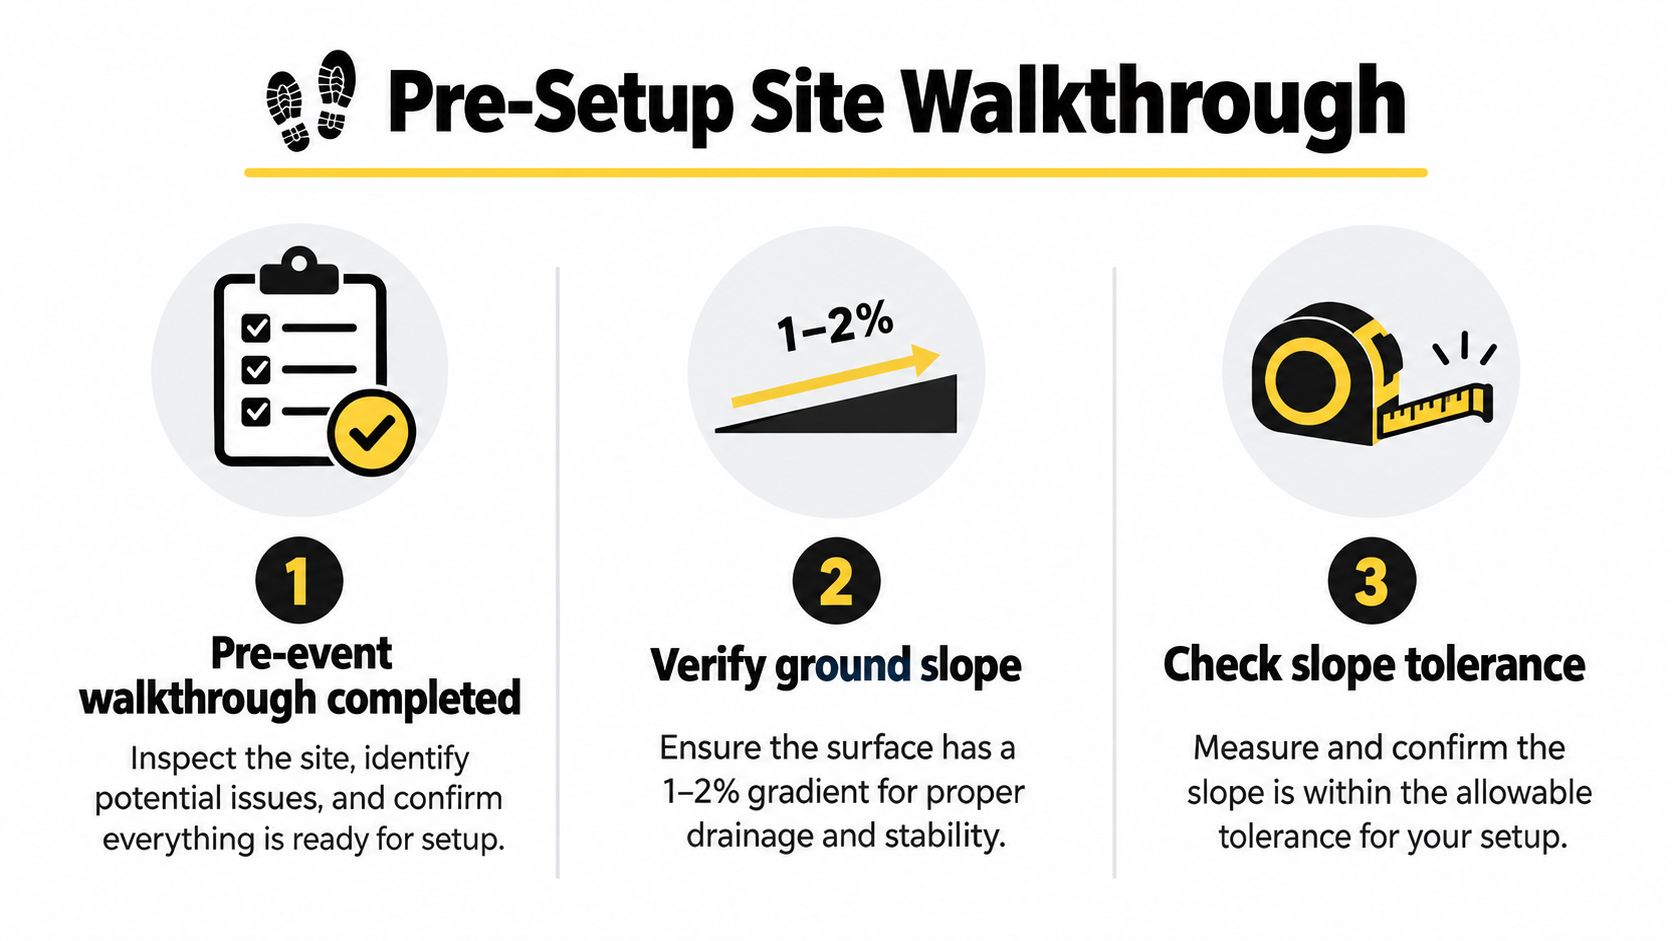
Don't drop the trailer and start inflating immediately. The first task is a pre-event walkthrough with the unit still unloaded, because the available footprint often looks larger than it really is once the inflatable, entrance, blower tube, queue, and exit area are included.
Start with the ground. The pad should be flat, firm, and free of sharp objects. The manufacturer's site requirements control, but a practical planning check should identify whether the ground has a slope that could make the unit rock, twist, or drain users toward an exit. The provided site guidance identifies a typical slope tolerance of 1% to 2%, so measure rather than relying on eyesight. A small digital level or long straightedge can expose a problem that looks harmless from the trailer.
Measure the complete operating footprint
Pull a tape around the planned installation area. Include the inflatable's published dimensions, the entrance ramp, slide runout if the unit has one, the blower position, the queue lane, and space for attendants to reach the structure. Keep the entrance away from vehicle paths and avoid placing the unit where spectators will naturally stand behind the blower or along an emergency route.
Look overhead before the unit rises. Tree limbs, tent guy lines, light poles, utility lines, and building projections can interfere with inflation or create hazards when wind changes. The required clearance depends on the manufacturer's rental specification, so compare the fully inflated height with the actual venue conditions rather than estimating from the deflated bundle.
Record what the crew found
Scan the ground for sprinkler heads, roots, broken concrete, drainage grates, gravel, glass, and exposed hardware. Confirm that the delivery vehicle can reach the setup area without blocking emergency access, and identify the power source before cords cross a guest path.
Take timestamped photographs of the empty site, the surface, nearby obstructions, and the proposed anchor locations. If the venue has unusual concrete, asphalt, or indoor flooring, it can also help to review practical concrete playset foundation tips when discussing surface preparation with the site manager. The point isn't to copy a foundation design. It's to make the surface condition part of the planning conversation.
Walkthrough standard: Don't unload until the crew knows where the unit will sit, how it will be anchored, where guests will enter, and how the equipment will be removed.
Anchoring the Unit to Match the Surface
Anchoring is the highest-value physical control in bounce house setup. A blower makes the structure firm, but it doesn't keep the structure from shifting or lifting. The anchor system does that, and the correct system depends on what lies beneath the unit.
On grass or dirt, use the manufacturer-specified steel stakes at every designated anchor point. Field guidance commonly describes 18 to 24 inch stakes driven fully into the ground at approximately a 45-degree angle, with the exact hardware controlled by the unit's instructions and the soil condition. A stake placed in loose fill, shallow soil, or a hidden void may look secure while providing little resistance.
On concrete or asphalt, don't drive stakes and don't substitute whatever heavy object happens to be nearby. Use approved ballast, such as commercial sandbags, water barriers, or concrete weights, sized for the inflatable and the manufacturer's requirements. The cited field guidance ranges from roughly 40 to 50 pounds per anchor point for smaller units and 80 to 100 pounds per point for larger commercial units, but the equipment manual and applicable standard control the final requirement. Surface-specific inflatable anchoring guidance explains why ballast selection and tether geometry matter.
Anchor Selection by Surface
| Surface | Approved Anchor | Minimum Anchor Count | Common Failure |
|---|---|---|---|
| Grass or firm dirt | Manufacturer-approved steel stakes | Every designated anchor point | Short stakes, loose soil, or partially driven hardware |
| Concrete | Approved commercial ballast | Every designated anchor point | Patio furniture, undersized weights, or slack tethers |
| Asphalt | Surface-approved ballast or engineered anchoring | Every designated anchor point | Assuming asphalt can safely accept ordinary stakes |
| Indoor hard floor | Venue-approved ballast and floor protection | Every designated anchor point | Ignoring floor protection, access, ventilation, or clearance |
The table's minimum count means all designated anchor points, not only the four corners. Commercial units often require 6 to 8 anchor points or more, depending on size and design. Count the D-rings or tie-downs on the actual unit, compare them with the manual, and record the anchor type, count, surface condition, and any unusual limitation.
Anchoring decision: If the surface can't accept the specified stake, stop and change the anchoring method. Don't make the inflatable fit the shortcut.
Inflate and square the unit before final tethering when the operating manual directs that sequence. Securing lines too early can twist the structure or distribute the load unevenly. Once the house is fully upright and correctly positioned, remove slack from every tether and verify that each anchor bears against the intended load direction. Never use plastic jugs, chairs, tables, or decorative objects as improvised ballast.
Inflation, Squaring, and Tethering in the Right Order
The operator sequence affects the final anchor load. A bounce house that's tied down while soft or skewed can appear secure but carry slack, twists, and uneven tension once children begin moving inside.
Prepare the unit
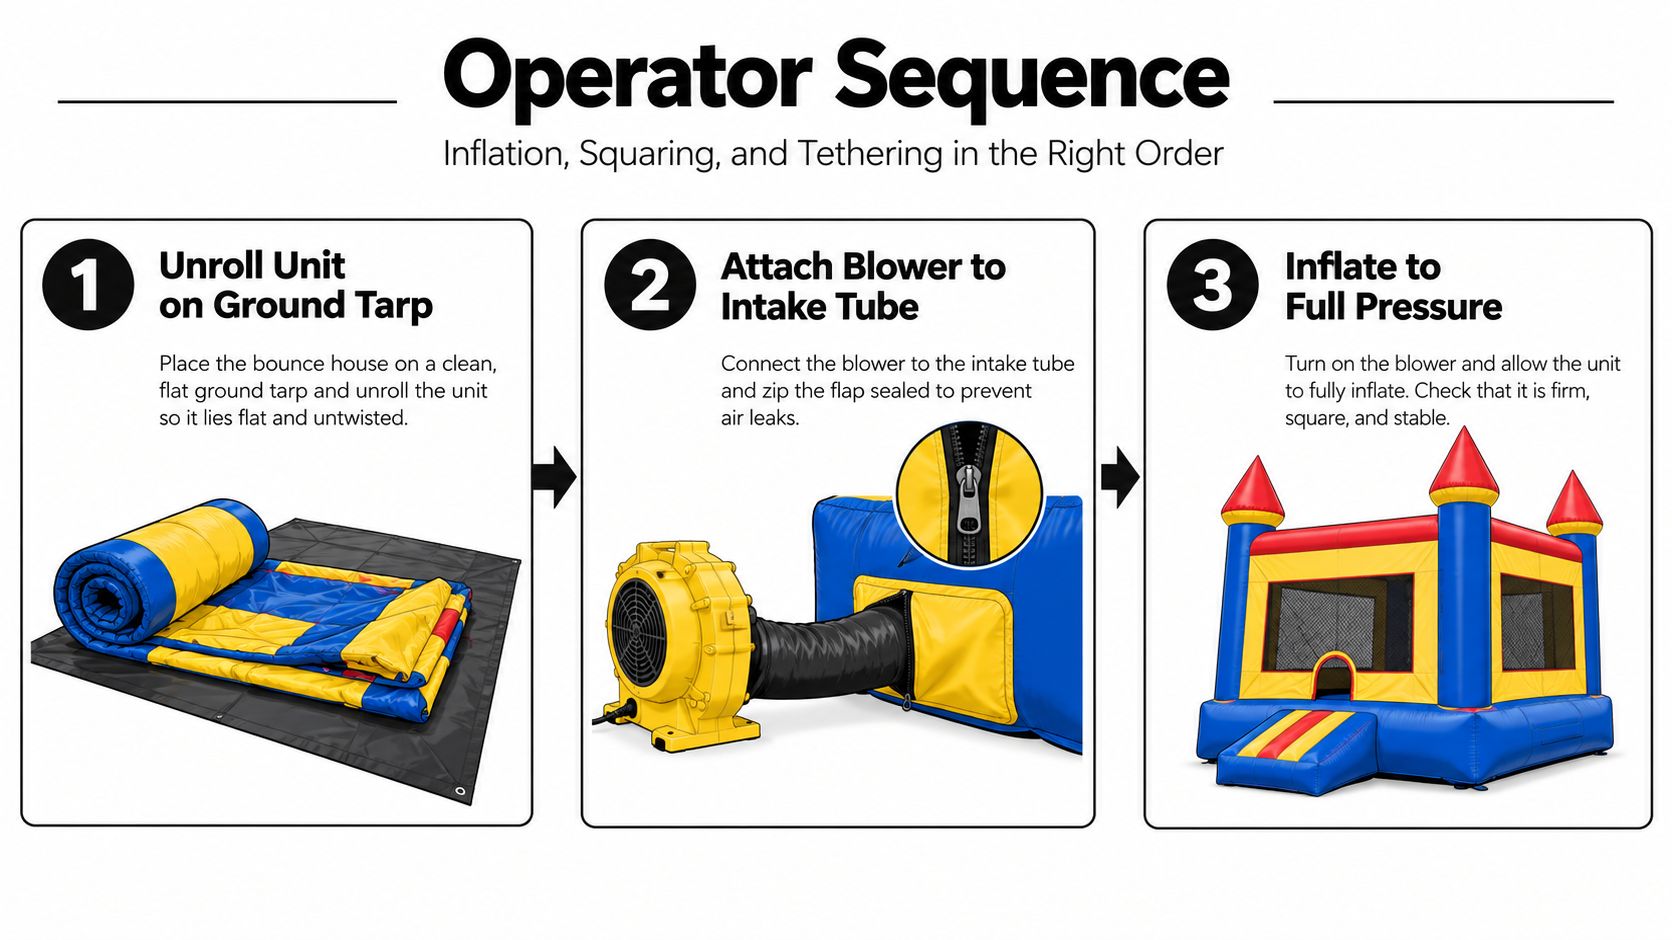
Place a ground tarp beneath the inflatable where the venue and manufacturer permit it. Unroll the unit in the planned direction, keeping the entrance and exit clear of vehicle routes, crowd lanes, and hard obstructions. Locate the blower intake tube, attach the blower firmly, and seal the unused tube flap or zipper so air doesn't escape through an open closure.
Run the blower and allow the structure to reach full operating firmness. Inspect the seams, columns, base, entrance, and internal walls while the unit rises. If one side inflates more slowly, stop and investigate the tube, zipper, power supply, or obstruction rather than compensating with an improvised tie-down.
Square before you secure
“Squaring” means aligning the unit with its intended footprint. Check that the corner columns stand upright, the base seams follow the layout lines, the entrance ramp lies flat, and the structure isn't drifting toward a fence, wall, queue, or anchor. A skewed appearance can indicate uneven pressure, a sloped surface, or a unit that wasn't unrolled cleanly.
With the inflatable fully firm and positioned, attach the tethers in the order specified by the manufacturer. A common field sequence starts at the rear corners, then the front, then the sides, but the manual takes priority. Use rated ratchet straps or compliant tie-downs, and make each line taut without pulling the unit out of square.
The shortcut that fails: Tethering a soft, half-inflated unit leaves slack. When the structure firms up or shifts under load, that slack can release suddenly or pull the anchor in an unintended direction.
Finish with a blower check. Confirm continuous airflow, listen for pressure drops, inspect the intake connection and sealed tube, and keep the blower on a dedicated, GFCI-protected circuit where cords won't cross guest traffic.
The visual sequence is useful during crew training, especially for new technicians. Review the operator sequence for inflatable safety before assigning setup duties, then have the lead technician verify the final condition in person.
Wind Limits and Real-Time Weather Monitoring
Wind management must be a hard operational control, not a judgment call made because guests have already arrived. A unit can look stable during calm conditions and still face a sudden load from a gust, especially when anchors are poorly matched to the surface or a structure sits near an obstruction that changes airflow.
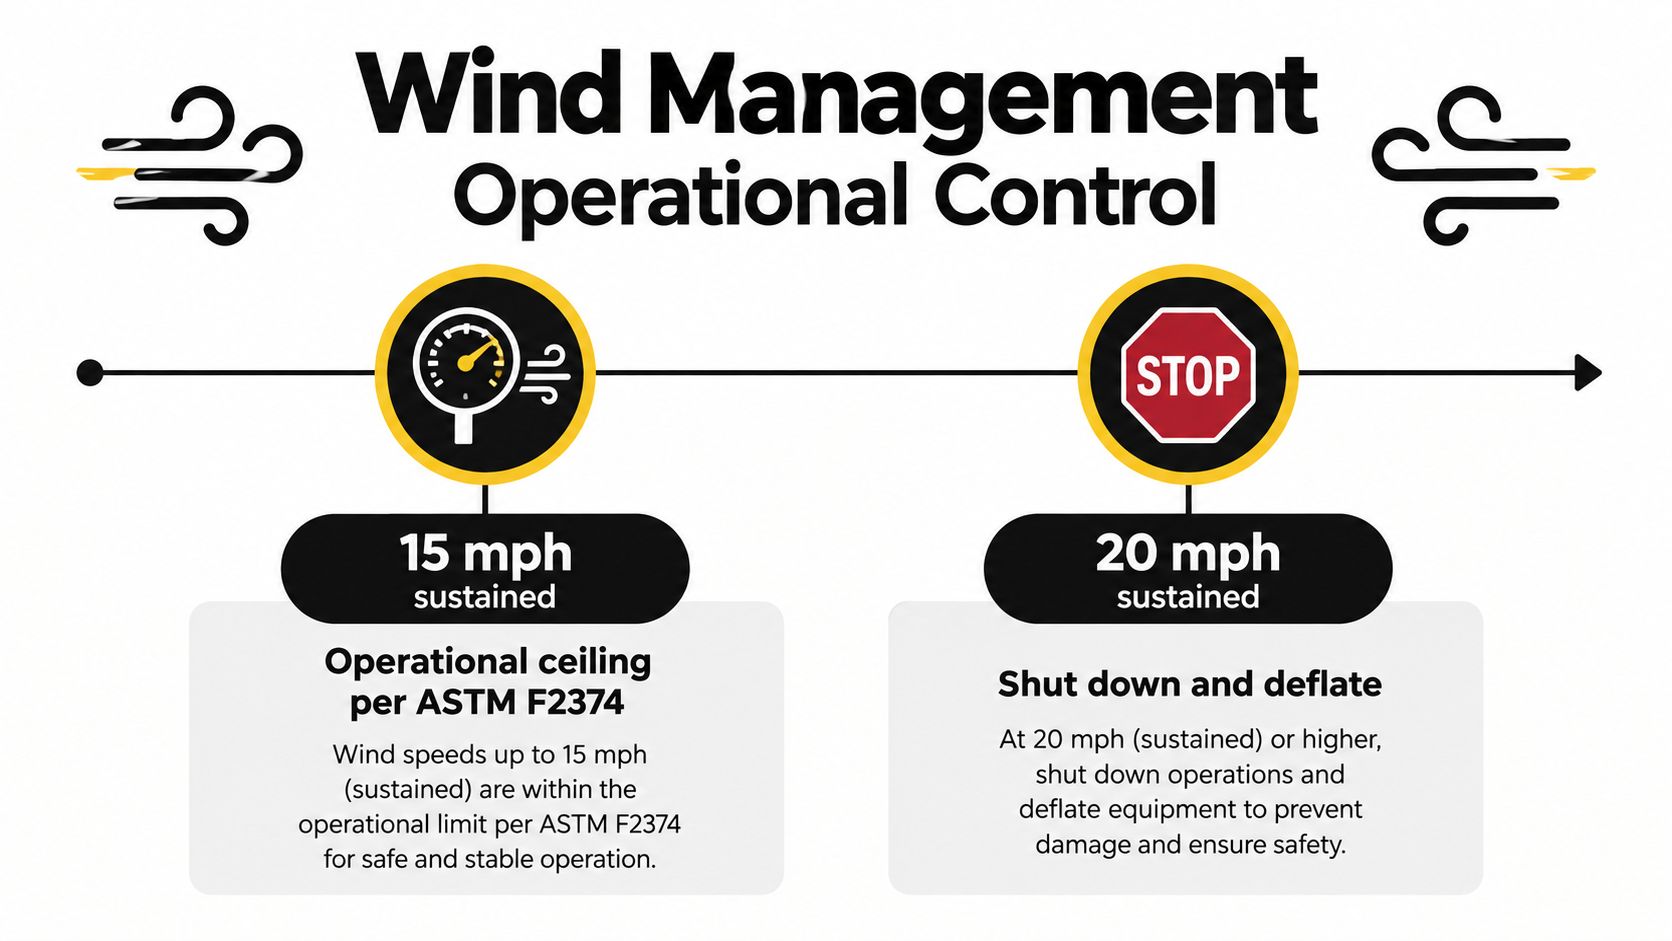
The available guidance sets important boundaries. ASTM F2374 permits a maximum operational wind speed of at least 25 mph only when anchorage has been verified by a professional engineer, and the operating wind speed must be at least 5 mph below the wind speed for which the anchoring system was designed. General CPSC guidance is more conservative for field use. It advises against use in windy conditions and recommends shutdown when wind speeds exceed 15 to 25 mph, with all anchor points used and the unit on a flat, even surface. The meteorological analysis and inflatable wind guidance provides the technical context for treating wind as a setup and operating variable.
Use readings, not instinct
A practical crew assigns one person to own the weather decision. That wind warden checks a handheld anemometer near the unit, watches weather alerts, and communicates the shutdown status to the attendant and event contact. Check at regular intervals and after a noticeable weather shift. Gusts matter because a reassuring average can hide the force that moves the structure.
Write the trigger into the event plan before guests arrive. The applicable rule may be the manufacturer's limit, a state requirement, the venue's policy, or the stricter CPSC recommendation. If those requirements conflict, use the more conservative instruction and document who made the decision.
Shutdown rule: Clear users first. Then reduce blower operation and deflate in a controlled direction away from spectators, vehicles, and unsecured objects.
Don't allow an event coordinator to overrule the operator because a line has formed. The CPSC injury data includes 113,272 emergency-department-treated inflatable-amusement injuries from 2003 through 2013, which is why wind, anchoring, and shutdown decisions belong to trained personnel rather than crowd pressure. Phantom's weather and inflatable guidance can support pre-event conversations, but the unit's manufacturer instructions and local requirements remain controlling.
Operator Supervision and the Active Inspection Checklist
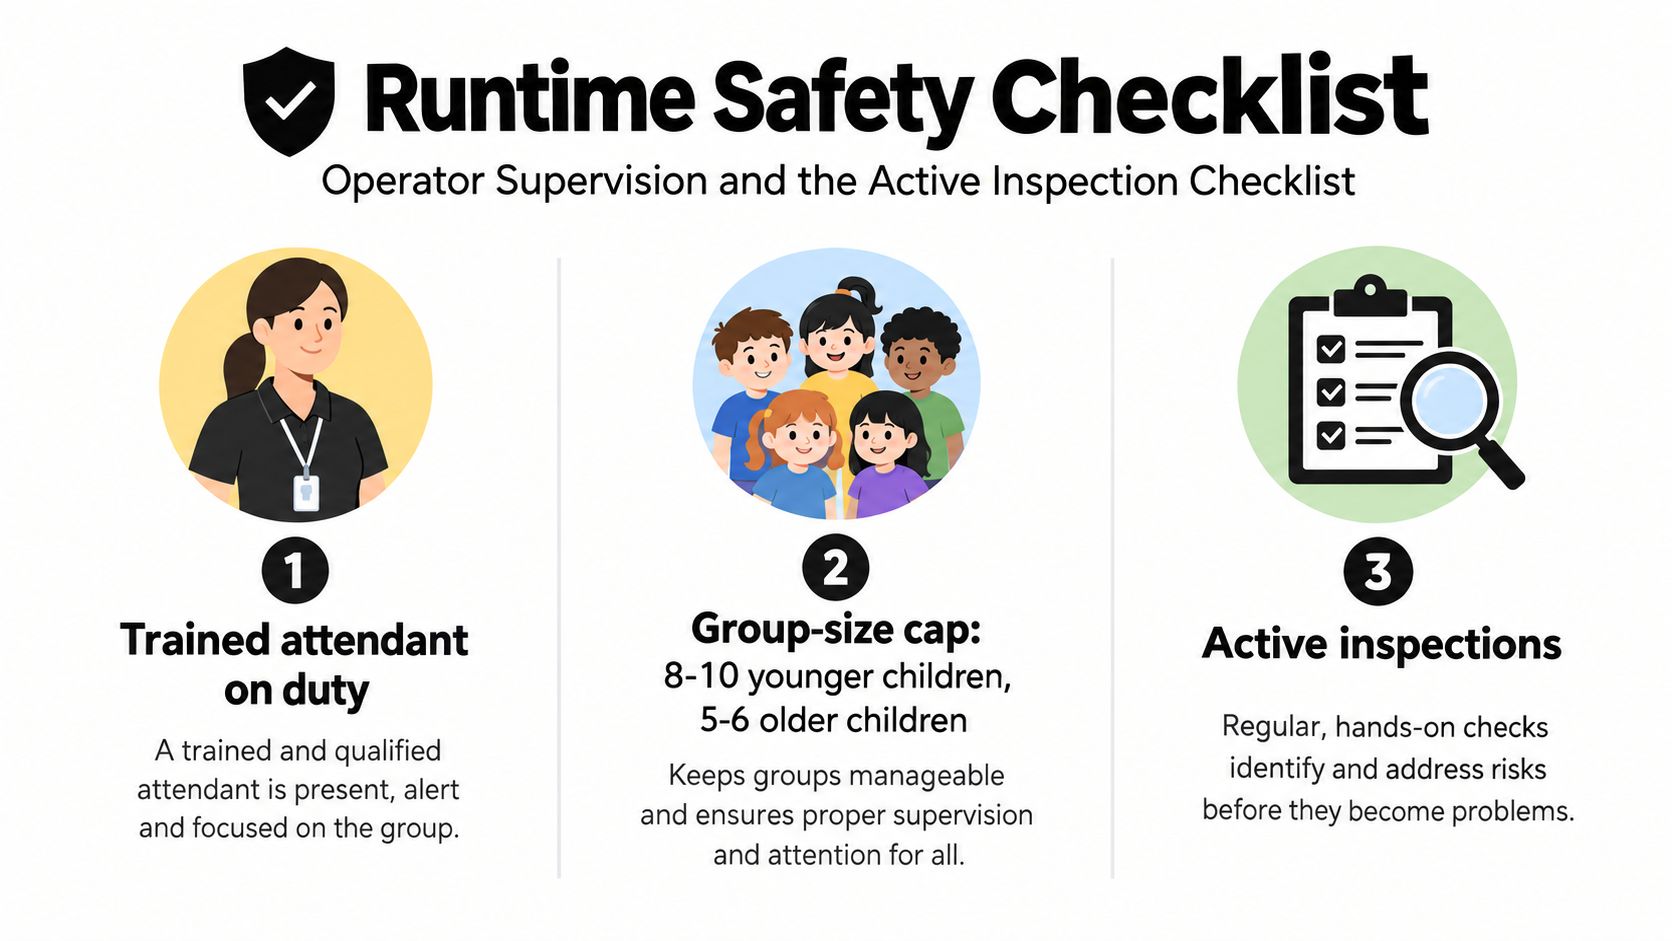
Setup ends when the inflatable is ready. It doesn't end when the first child enters. A trained attendant provides the runtime control that keeps the approved setup from deteriorating through overcrowding, mixed-size play, damaged equipment, or rule violations.
The attendant should stand where the entrance and interior are visible, not beside the registration table or behind a camera. Before admitting users, the attendant explains the rules in language children understand: shoes off, no food or drinks, no sharp objects, no glasses when the equipment rules prohibit them, no flips, no climbing, and no pushing.
Control the group before controlling the play
The provided operating plan identifies a typical capacity of 8 to 10 younger children or 5 to 6 teens on residential units, but the posted manufacturer capacity and the actual unit design take priority. Separate age and size groups. A smaller child and a much larger user can share the same space only if the operator's rules and the unit's limits allow it, and many situations call for separate turns to reduce collision risk.
Use a predictable traffic pattern:
- Entry: Shoes and prohibited objects stay outside. Users enter one at a time.
- Play: The attendant stops flips, wall impacts, wrestling, climbing, and roughhousing.
- Exit: Children leave single file instead of piling up at the ramp.
- Reset: The attendant pauses entry when the interior needs to clear or a rule needs reinforcement.
A calm, repeated instruction works better than shouting after a problem starts. “Feet first, no flips” and “wait until the ramp is clear” are short enough for a busy event and specific enough to enforce.
Inspect while the unit operates
Perform a visual sweep of seams, anchor points, blower pressure, the intake tube, and the zipper or flap at regular intervals. The assigned cadence in this operating plan is every 15 to 30 minutes, with an immediate inspection after a hard impact, a sudden increase in rough play, or a weather change.
Use a written log. Record the inspection time, attendant initials, observed condition, user count or queue issue, rule violations, deflations, incidents, and restarts. A practical workplace inspection checklist offers a useful model for assigning responsibility and documenting observations, even though the inflatable's own manual remains the primary reference.
The same discipline applies to other attractions. Teams responsible for mixed event equipment can review mechanical bull safety procedures to see how active supervision and documented inspections carry across different ride types.
Teardown, Post-Event Inspection, and Documentation
Teardown is another controlled operation. Guests may have left, but the crew still has to prevent sudden movement, protect the vinyl, and identify damage before the equipment returns to the trailer.
Begin by clearing users and spectators from the unit and its working area. Turn off the blower and allow the inflatable to deflate before detaching tethers, unless the manufacturer's instructions require a different sequence. Removing anchors while the structure is still pressurized can let it shift unexpectedly, especially on a hard surface or in changing wind.
Inspect while the vinyl is visible
As the unit lies flat, examine the seams, stitches, columns, base, entrance, exit, and every tie-down point. Look for new cuts, pulled stitching, abrasion, staining, missing hardware, or distorted anchor straps. Cleaning and drying requirements vary by material and manufacturer, so follow the equipment manual rather than folding wet or visibly contaminated vinyl into storage.
Fold the unit using the manufacturer's specified pattern. If the manual calls for folds in thirds, follow that pattern to reduce unnecessary creasing and keep the next deployment predictable. Secure the rolled equipment so it won't shift inside the trailer, and keep the blower, cords, stakes, ballast, repair materials, and inspection records associated with the correct unit.
Close the event file
Complete a final walk-around with the venue representative when possible. Show any surface damage, staining, displaced ballast, turf disturbance, or equipment issue before the crew leaves. A signed acknowledgment is more useful than a later disagreement about whether a condition existed before delivery.
Retain a complete event file containing:
- Rental agreement: Keep the signed contract, venue rules, weather policy, and equipment identification.
- Setup record: Note the surface, anchor type, anchor count, placement, blower connection, and final inspection.
- Incident log: Record injuries, rule violations, shutdowns, deflations, restarts, and corrective action. If nothing happened, retain a completed no-incident record rather than leaving the field blank.
- Photographs: Store timestamped pre-event and post-event images of the site, unit, anchors, entrances, and any damage.
- Customer acknowledgments: Retain the signed damage waiver or release where applicable, along with any venue sign-off.
- Maintenance follow-up: Quarantine damaged equipment until an authorized person evaluates and clears it for service.
Keep records for the period required by the rental company's policy, insurer, contract, and applicable state or local rules. Store them in a named event folder with restricted access and a reliable backup. ASTM F2374 includes auditing and inspection within its scope, so documentation should be easy to retrieve, not scattered across a technician's phone, a paper clipboard, and an unlabelled trailer envelope.
A defensible bounce house setup file answers five questions quickly: where was it placed, how was it anchored, who inspected it, what happened during operation, and what condition was it in when it left.
Phantom Entertainment handles delivery, bounce house setup, and professional operation for events across Pennsylvania and the Mid-Atlantic, with venue-ready safety documentation for schools, campuses, companies, and community organizers. Visit Phantom Entertainment to discuss your site, surface, guest group, weather plan, and the inflatable package that fits your event.
Ready to Book Your Event?
PA state-inspected, fully insured since 1979. Call us or get a free quote today.